I've somehow gotten it into my head that I need retractable landing gear (probably something to do with being totally awesome). So the next step in the build involved a lot of planning (i.e. holding the wing and trying to figure out how it was all going to work) and waiting for the retracts I ordered to arrive.
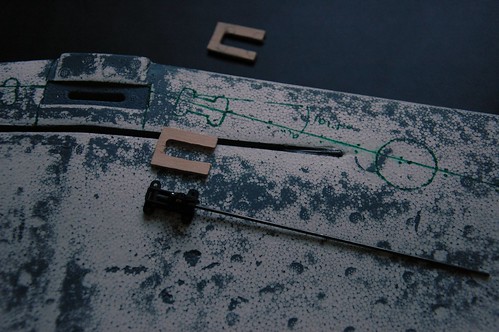
When they finally showed up, I spent some more time thinking about how I was going to mount them and decided I would need to build something to screw them in to. First, I used the actual retracts to trace out the outlines of where I wanted the retracts to go using a marker. This let me get an idea of how it would all go together. Next I cut the little mounting platforms out of some aircraft plywood I had left over from a previous project.
Next came the scary part: Actually mounting them in the wing. First I cut a depression in the wing that the mounting platforms could sit in, and made sure it was snug. It helped to trace the wood with the Xacto knife rather than trying to measure it and get everything lined up that way. Then I had to hollow out some more of the wing to allow the retract mechanism to function.
To do this, I used both the Xacto knife (to cut the sides of the cavity) and then the dremel (to hollow it out and do more serious material removal). I ended up with a ton of tiny styrofoam particles and a little hole in the wing.
A side note: I found it best to run the dremel on its slowest setting with a straight edged rotary cutter (since I didn't have a grinding bit like other people I've seen). The straight edge helps a LOT when carving out sides of the cavity. The only other trick is to go slow and be careful, the dremel will sink through the foam like it wasn't there, so make sure you're holding steady.
I kept going, test and testing and testing after almost every cut. One of the hardest parts is making sure the two sides of the gear are at the same angle. (We'll see how I did when it comes time to hook some actual wheels up to this thing.) I'm hoping I can fix any little errors when it comes time to actually glue the retracts into the wing.
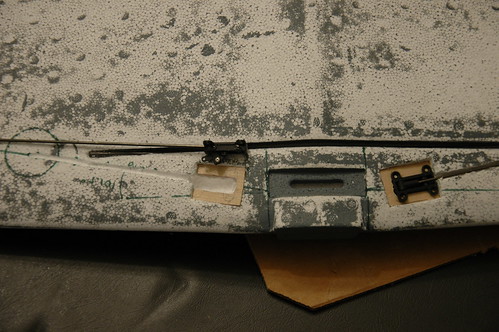
At the end of the operation I had a both retracts (almost) mounted in the wing, but there's still a lot of work left to do.
No comments:
Post a Comment